Showing posts with label tomato. Show all posts

September 9, 2012

Light and Lemon-y Pasta

Night before last I was (strangely) craving pasta.  Usually, pasta is not my thing.  I'm not sure why, but I just don't really crave it...maybe it's because I usually find it to be too heavy and unsatisfying.  More times than not, I end up making it for Bo, and throwing together something else completely for myself.

Not two night ago.

Surprisingly, I actually wanted pasta, AND I wanted the last of our summer tomatoes.  So, I threw together a light and lemon-y pasta dish that satisfied all of my cravings.  The result was colorful, nutritionally balanced, and - most importantly - delicious!


Light and Lemon-y Pasta
Serves 2

2 campari tomatoes, diced
2 handfuls of spinach, torn
zest of 1 lemon
1 1/2C uncooked pasta
1/2 lemon (squeezed to remove juice)
1/2T EVOO
1/4C Parmesan
salt and pepper, to taste
1/2 avocado, diced

Directions:
  • Add the diced tomatoes, torn spinach, and lemon zest to a large mixing bowl.
  • Cook the pasta according to package directions.
  • While the pasta is cooking, whisk together the lemon juice and EVOO.
  • Once the pasta is cooked, drain it and then immediately add it to the tomato/spinach/lemon zest mixture.  Toss together.
  • Add the Parmesan cheese, and then pour the lemon juice and EVOO dressing on top.
  • Toss to incorporate and melt the cheese.
  • Season with salt and pepper to taste.
  • Garnish with avocado chunks, and serve quickly (before the avocado turn brown).


Oh hi Lola!  
(Thanks for poppin' in!)

You can always count on Lola to be close by whenever food is involved...surprisingly, she loves ALL food (i.e. not just meat and peanut butter).  Even if I am cooking a vegan/vegetarian dish, she is directly under-foot and intently interested (and hopeful that I might drop a mouthful - or two)!


I captured the perfect lighting in the picture below (probably my favorite out of the bunch).  You can really see all of the dish's colors in this one:
  • red from the tomatoes;
  • green from the spinach and avocado;
  • brown from the pasta;
  • yellow from the lemon zest; and
  • flecks of white from the Parmesan cheese.  

Hmm...hmmm...good!


As a TOTAL tangent: 
Look at how much my hair is growing!


Remember when is was THIS short?!

(That was last Thanksgiving...less than a year ago!)

Now it is just above my shoulders, and I can almost pull it into a full ponytail.  


For now, I am just going to keep letting it grow.  I don't really have any specific length in mind...as long as it continues to look healthy and shiny then I will just keep letting it get longer.  Who knows, maybe one day it will get this long...


Question of the Day:

What's your favorite pasta shape? Macaroni? Penne? Spaghetti? Lasagna? Shell? Orzo?

Personally, I like shells and penne because they capture lots of yummy sauce inside! :)

Blessings,
Ally and Bo

August 3, 2012

Summer Picnic With My Love

Even though Bo and I are married, live in the same house, sleep in the same bed, and see each other (almost) every day, sometimes we forget that "date nights" (or, in this case, "date afternoons") are still important.  And since, by some miracle, we both had today completely off from work, we decided to go on a picnic!

This morning, I spent an hour or so whipping up a special lunch; and I must admit that I felt like a regular Giada de Laurentis in the kitchen! :)  By 12:30 we were both starving and ready to hit the road!

Thankfully, we didn't have to travel far.  Less than a mile away is a local park; and since dogs are allowed, we decided to bring Lola along for the ride!  She has gotten SO BIG (over 50 pounds!) that now she has to ride in the back seat.  No more floor board of the passenger side for this little Labrador!


While Bo walked Lola around for a couple of minutes, I took my time setting the stage for our picnic date.  I brought an old family quilt along to decorate the table, and then I spread out our feast:


Since Bo wanted a little more protein with his lunch, I added some ham to his sandwich.  In the end, he actually said that he thought the sandwich was a little better without the meat.  SCORE for the vegetarians!


I guzzled my lunch down with Virgil's Zero Cream Soda, while Bo sipped on Steaz Zero Calorie Orange.  Both were delicious; but truth be told, my cream soda was the best out of the two.  It really tasted like the real thing!


Lola sitting pretty for a treat!


My handsome hubby enjoying his panini.


Me - chowing down.
(And yes, I burned my bread.  
What can I say, I am my mother's daughter (hehehe)!)


Absolutely LOVING what natural light does to my photography skills!  

Lesson: I think I need to take more pictures outside!


This fruit salad was simple and out-of-this-world delicious!  It was - in both of our opinions - the best part of the whole picnic.  And since I know you want it, here is the quick and easy recipe:

Minted Fruit Salad
Serves 2

8 medium strawberries, diced
1/2 C blueberries
1 medium nectarine, diced
1 packet of stevia
1/2T lemonjuice
1/2 tsp dried mint

Directions:
  1. Add the strawberries, blueberries, and nectarine to a small mixing bowl.
  2. Sprinkle the stevia, lemonjuice, and mint over top.
  3. Toss to incorporate.
  4. Chill until ready to serve.

It really is as easy as 1-2-3-4!


Lola chillin' in the shade...no doubt wishing she could play with the kids on the playground.


This macaroni pasta salad wasn't my recipe, and it wasn't a home-run.  Truthfully, it was just so-so.  Next time, I think I would do better to just come up with something of my own.  Regardless, it did hit the spot when Bo and I were still a little hungry after eating our sandwiches (Bo has a full sandwich, I just had a half)


Yummm...


All gone. :)


Afterwards, we took a little walk to help digest our food.  Since it was VERY hot, we tried to stay in the shade as much as possible.  We watched Lola carefully to make sure she didn't overheat, and we also gave her lot and LOTS of water.

At one point, we even talked Lola into playing on the playground!


She and her Daddy even went down the slide!  
(I'm not sure she enjoyed it.)


We didn't get a picture of it, but Lola thought the swings were so. much. fun.  While I was swinging, she kept trying to jump up and catch me!  It was too funny to watch her.  On the one hand she was totally confused by what was going on; while on the other hand she thought it was this new game that she couldn't wait to play. I can't wait to see what Lola will be like when we bring our future children to the playground.

It is certainly something to look forward to...

Next up:  a creative way to use up all of the zucchini that is abounding in your garden/local grocery store!  Delicious AND healthy potato filling anyone?!

Question of the Day:


When is the last time you went on a date with your significant other, and what did you do?!

Blessings,
Ally and Bo

August 2, 2012

Warm Goat Cheese, Spinach, and Tomato Panini

OH. MY. GOODNESS.  

I am SO EXCITED to share today's recipe with y'all!  In fact, in the past 48 hours Bo has eaten this panini three times, and I have eaten it once (plus a few stolen bites from Bo's servings...hehehe).

So, here's the back story:

Two days ago Bo requested a grilled cheese sandwich for dinner.  The chef in me thought that that sounded sort of boring.  So, instead of making us a traditional grilled cheese, I decided to use his suggestion as a basis for something much for sophisticated and delicious.

Enter: goat cheese

Armed with goat cheese as my secret ingredient, I proceeded to craft a sandwich that rivals  practically every deli sandwich I have eaten in my entire life.  Subway, Quiznos, Panera, you've got nothin' on me!

Ooey, gooey, and delicious!  This sandwich has the same creaminess as a childhood-classic grilled cheese, but with a refined twist.  If you can, eat this sandwich warm.  There is just something about warm bread and goat cheese that does a body (and a soul) good!

Warm Goat Cheese, Spinach, and Tomato Panini
Serves 1

2 slices of whole wheat bread (or bread of choice)
1.5 oz. goat cheese
1/3 medium tomato, sliced
small handful of spinach
salt, for garnish
pepper, for garnish
balsamic vinegar, for drizzling

Directions:
  • Preheat a non-stick skillet over medium heat.
  • Microwave the goat cheese for 10-15 seconds, just until it is easily spreadable.
  • Spread a generous layer of the goat cheese over each piece of bread.
  • Layer the spinach on top of the goat cheese.
  • Add the thinly sliced tomatoes on top of the spinach.
  • Sprinkle with a small pinch of salt and pepper.
  • Drizzle with a small amount of balsamic vinegar.
  • Place the top layer of bread onto the sandwich.
  • Add the panini to the preheated skillet, and place a cast-iron skillet on top of it (this is to weight it down and to ensure that all of the ingredients meld together as they heat up).
  • Cook on one side for 2-3 minutes, until the bread is browned - but not burned!
  • Flip, and replace the cast-iron skillet on top of the panini.
  • Cook on the other side for 2-3 minutes.
  • Serve warm with fruit, chips, or any other side(s) of your choice.


I can't decide between these two pictures:  On the one hand, the top picture shows really great color definition of the panini.  The green, red, and white are so vibrant.  Heck, you can even see the speckled brown on top of the bread!  On the other hand, the bottom pictures has great lighting!  I love how you can still see the grapes, the plate, and the surrounding items in some definition.

In a perfect world, I would have both the talent and the equipment to take a picture that is somewhere right in the middle.  Until then, I will just keep honing my skills, and waiting for Christmas (or Bo's next pay raise!).


Question of the Day:


Do you like goat cheese?  If not, what other kinds of cheese DO you like (Who know...maybe I could come up with a sandwich using one of your favorites!)?

Blessings,
Ally and Bo

July 8, 2012

Herb-Roasted Summer Vegetable Salad

Man oh man I just L.O.V.E. summer produce!  There is something about the fresh abundance of colors, flavors, shapes, and sizes of summer foods that I can't seem to get enough of.  I honestly think that I could eat fruits and vegetables for breakfast, lunch, and dinner all summer long and not get sick of them in the least.

HM...HMMM...GOOD!

Last night Bo and I headed over to a friend's house for a dinner party.  I was in charge of bringing a salad.  I'm not sure, but I suspect that the hostess was expecting a salad filled with the the traditional mixed greens, tomato, carrots, celery, etc.  But you know me, I had something totally unique in mind (go figure)!  Instead, there wasn't a piece of lettuce in sight, and in its place was a regular cornucopia of rainbow-colored vegetables, dried herbs, and a tangy-sweet vinaigrette.

Honestly, who wants to eat the same ol' boring dinner salad anyways?!

If you have a plethora of summer produce ripe and ready to be eaten, this salad is for you!  My kitchen was overflowing with squash, mushrooms, asparagus, and tomatoes - so that's what I used - but feel free to substitute any of the ingredients with what you have on hand.  Zucchini, green beans, and/or potatoes might be wonderful exchanges or additions.   Whatever vegetables you use, DON'T FORGET the herbs!  The sweet pine and citrus flavor of the marjoram is a must, and you can never go wrong with a little basil and thyme.

Herb-Roasted Summer Vegetable Salad
Serves 2-4

3 small crooked neck squash, cut into half moons
3 tomatoes, cut into cubes
1 packet of mushrooms, roughly chopped
1 bunch of asparagus, woody ends removed and cut in half
1 tsp salt
1/2 tsp pepper
1 tsp dried marjoram
1 tsp dried basil
1/2 tsp dried thyme
3T EVOO, divided in half
1T apple cider vinegar
1T Dijon mustard
1/2T lemonjuice

Directions:
  • Preheat the oven to 425 degrees.
  • Place the squash, tomatoes, mushrooms, asparagus, salt, pepper, marjoram, basil, thyme, and 1 1/2T EVOO into a large mixing bowl.
  • Toss to coat.
  • Pour onto a large baking sheet.
  • Roast for 30-35 minutes.
  • Meanwhile, whisk together the remaining 1 1/2T EVOO, apple cider vinegar, Dijon mustard, and lemonjuice.
  • After the vegetables have finished roasting, pour over the dressing and toss to coat.
  • Refrigerate until chilled.

I'm not sure, but I think my photography may be getting a teensy bit better.  What do you think?  Can you see any improvement?!


Question of the Day:


What are your favorite herbs to use in the kitchen (by the way, salt and pepper don't count as herbs)?


I tend to use a lot of basil, thyme, and oregano; but I also LOVE to experiment with new herbs...they really can take a so-so dish and change it to out-of-this-world status!

Blessings,
Ally and Bo

June 12, 2012

Zucchini and Mushroom Flatbread with Homemade Tomato Dipping Sauce

Like many people, but perhaps more than most, I am a creature of habit.  

For example:

Since all of my yoga classes are taught either in the morning or in the late evening, I am almost always home between the hours of noon-5:00PM.  As a result, from 3:00-4:00PM I watch back-to-back episodes of Giada at Home, and from 4:00-5:00PM I watch back-to-back episodes of the Barefoot Contessa, Back to Basics.  As you might expect, I frequently get ideas for new recipes from their shows.  Just the other day Giada made this Zucchini and Olive Flatbread.  Since we had been craving Italian cuisine - especially pizza - for a few days, I thought that this recipe might just fit the bill...

The problem was, although I find them delicious, Bo really dislikes olives.  Therefore, I couldn't simply remake Giada's recipe.  No, instead, I would need to rework it to suite our tastes (not to mention what we had on hand in the refrigerator/pantry).

After gathering up some mushrooms that we bought at the farmer's market this past weekend, as well as a few additional spices and concocting a homemade tomato dipping sauce, I knew that I was onto something good!

With its thin crust and herb-infused flavor, this flatbread is one of the many perfect ways to enjoy summer's most beautiful vegetables.  As a suggestion, don't smother the delicate flavors of the zucchini and mushrooms by drowning them in cheese.  Instead, sprinkle on just enough to complement the freshness of both the vegetables and the herbs.  You will leave the dinner table satisfied - but not stuffed - with ample room for dessert! ;)

Zucchini and Mushroom Flatbread
Serves 4-6

All-purpose flour for dusting
1 lb. homemade pizza dough (or pre-made from your grocery store or local pizzeria)
2 T EVOO, divided
3 small zucchini, sliced into half-moons
7 portabellini mushrooms, chopped
2 tsp dried oregano
1 tsp garlic powder
4 oz. shredded organic mozzarella cheese (or cheese substitute)
salt and pepper, to taste

Directions:
  • Preheat the oven to 450 degrees.
  • On a floured surface, roll out the pizza dough into a thin, large rectangular shape.
  • Transfer the dough onto a greased baking sheet.
  • Prick the dough with a fork, and drizzle 1T of EVOO on top.
  • Arrange the zucchini and mushrooms on the flatbread.
  • Drizzle the other 1T of EVOO on top of the vegetables.
  • Bake for 18-20 minutes.
  • Pull the flatbread out of the oven.  
  • Sprinkle the oregano, garlic powder, salt, pepper, and cheese on top.
  • Return to the oven to bake for an additional 5-7 minutes.
  • Allow the flatbread to cool for 5 minutes.
  • Serve alongside Homemade Tomato Dipping Sauce (recipe below).

No surprise here, but I love a little tomato something-or-other with my Italian cuisine.  As good as the Zucchini and Mushroom Flatbread was, it seemed to be calling out for some tomato-based pairing.  Since I didn't have any canned pasta sauce on hand, I decided to use what I did have to whip up something homemade.  And whaddya know but my tomato sauce experimentation turned out better than any canned sauce I have had in a looong while!

Homemade Tomato Dipping Sauce
Serves 4

1 can diced tomatoes
3 garlic cloves, minced
1 tsp garlic powder
1 tsp dried oregano
2 tsp dried basil
1/4 tsp cayenne pepper

Directions:
  • Pour the diced tomatoes into a small saucepan warmed over medium high heat.
  • Immediately add the minced garlic cloves.
  • Once the mixture begins to boil, reduce heat to low and use a potato masher to crush the tomatoes and garlic.
  • Add the garlic powder, oregano, basil, and cayenne pepper.
  • Cook for an additional 5-10 minutes until the mixture begins to thicken.
  • Serve with homemade bread sticks, flatbread, or on your favorite pasta!

Question of the Day:


Do you usually follow recipes "by the book," or do you experiment and tweak them as you go along?!

Blessings,
Ally and Bo

June 5, 2012

Panzanella Salad

Before the age of 25, I had never even heard of Panzanella salad.  The salads I grew up with were your average garden variety.  Don't get me wrong, they were always delicious, but in general they consisted of lettuce, carrots, celery, and tomatoes topped with whatever bottled dressing was currently stocking our refrigerator door.  These days I like to change it up a little (okay, a LOT) when it comes to my salad repertoire.  So last night, when I saw a half-eaten loaf of Seeduction Bread from Whole Foods staring at me, I realized that I needed to come up with something that would use up several slices of this soon-to-be-stale bread.  A number of things ran through my head:

  • bread pudding - no...that's too sweet;
  • savory bread pudding - eh...still too much work; and
  • french toast - nah...too breakfastey AND too sweet.

And then it hit me!  

I remembered a time, about three years ago, when I was staying with a dear friend for a week or two.  This friend is a foodie, like me, and one summer evening she whipped together this amazing bread and vegetable salad and called it Panzanella.  It was d.e.l.i.c.i.o.u.s.!  Thinking back on it, I honestly can't believe that I have waited so long to recreate the dish in my own kitchen.

Well, wait no longer!

Panzanella is here!

Specifically, Panzanella is a Florentine salad of bread and tomatoes popular in the summer.  It includes chunks of soaked stale bread and tomatoes, sometimes also onions and basil, dressed with olive oil and balsamic vinegar.  It is also popular in other parts of central Italy.

Panzanella salad is an Italian salad that was probably an invention of necessity.  Italian cooks waste nothing, and this was a way to utilize stale bread and vegetables from the garden.  The record of Panzanella goes back centuries.  In the 1500's, a poem by the famous artist, Bronzino, described the salad.  Of course, the tomato was quite a few years from being introduced into the Italian kitchen.  Therefore, until the 20th century, Panzanella was based on onions.  
[Today, Panzanella] always includes bread and tomatoes plus vegetables from the garden.  Vegetables can include cucumbers and onions.  Other ingredients - lettuce, olives, mozarella, white wine, capers, anchovies, celery, carrots, red wine, tuna, parsley, boiled eggs, mint, bell peppers, lemon juice, and garlic - are sometimes used, but Florentine traditionalists disapprove of them.  (Source 1 and Source 2)

Here is my version of the classic Italian dish, using many of the vegetables that we found at the Riverside Arts Market this past Saturday!

Panzanella Salad
Serves 4

4 pieces stale bread (or bread left out overnight), cubed
4 garlic cloves, minced
3 large tomatoes, diced
1/2 red onion, diced
1 cucumber, peeled and diced
2-3 outer leaves of romaine lettuce, chopped
1 tsp dried parsley
1T dried basil
zest of 1 lemon
6T EVOO
1-2T balsamic vinegar
salt and pepper, to taste

Directions:
  • Preheat the oven to 350 degrees.
  • Drizzle the cubed bread with 1T EVOO.
  • Bake the bread cubes for 15-20 minutes, tossing every 7-8 minutes, until crispy and lightly browned.
  • Meanwhile, cook the minced garlic in 1 tsp EVOO until fragrant.
  • Add the tomatoes, onion, cucumber, romaine, parsley, basil, and lemon zest to a large salad bowl.
  • Add the cooked garlic.
  • Drizzle in the EVOO and balsamic vinegar, and season to taste with salt and pepper.
  • Toss to incorporate.
  • Add in the baked bread cubes; and toss.
  • Refrigerate for at least 20 minutes to allow the flavors to mingle.
  • Serve, chilled, alongside your protein of choice.

Next time - another book review (and this time the book is neither utopian/dystopian in theme nor Young Adult in genre).  In fact, it's historical fiction, and I can't wait to tell you all about it!

Question of the Day:


Have you ever had a Panzanella salad before?  If so, what did you think? If not, have you ever made your own croutons?!

Blessings,
Ally and Bo

June 2, 2012

Saturday Fun

This morning Bo and I woke up and decided to do something we had been planning to do for weeks...go to the Riverside Art and Farmer's Market!  Looking back on it, I don't know what took us so long, but whatever it was, we shouldn't have let it hold us back because this farmer's/art market is seriously awesome!
The Riverside Arts Market is "Jacksonville's Premiere Outdoor Arts & Entertainment Venue [and is] located ...under the canopy of the Fuller Warren Bridge."
Here's a panoramic view of part of the market located underneath the bridge.  
Pretty cool, huh?!


As we began to meander our way up and down the markets' first aisle, whaddya know but a little birdie wanted to let me know that he was overhead.

What, exactly, does that mean - you might ask.  

Well, let me enlighten you. 

It means that a bird pooped on my head!

I mean seriously...what are the odds?!

Thankfully my hair is light enough that you couldn't tell too much.  Bo used one of our re-useable grocery bags to try and pull most of it off of my scalp, but I couldn't perform proper damage control until we got home.  Oh well, I don't think anyone except Bo and I actually noticed.

With that said, now I know that birds pooping on people's heads isn't just something you see in the movies...lucky me. ;)


With the birdie-poop-incident behind us, Bo and I decided to concentrate on the abundance of produce around us.  In addition to the produce being absolutely beautiful, I was particularly thrilled that every fruit and vegetable in the entire market had been grown within two hours of Jacksonville, FL!  It doesn't hardly get more local than that!

And I have to say, buying produce that is locally grown leaves your feeling really good as a customer.  It feels so - I don't know...right?! - to know that you are funneling money right back into the community you call home.

Bountiful ears of corn.


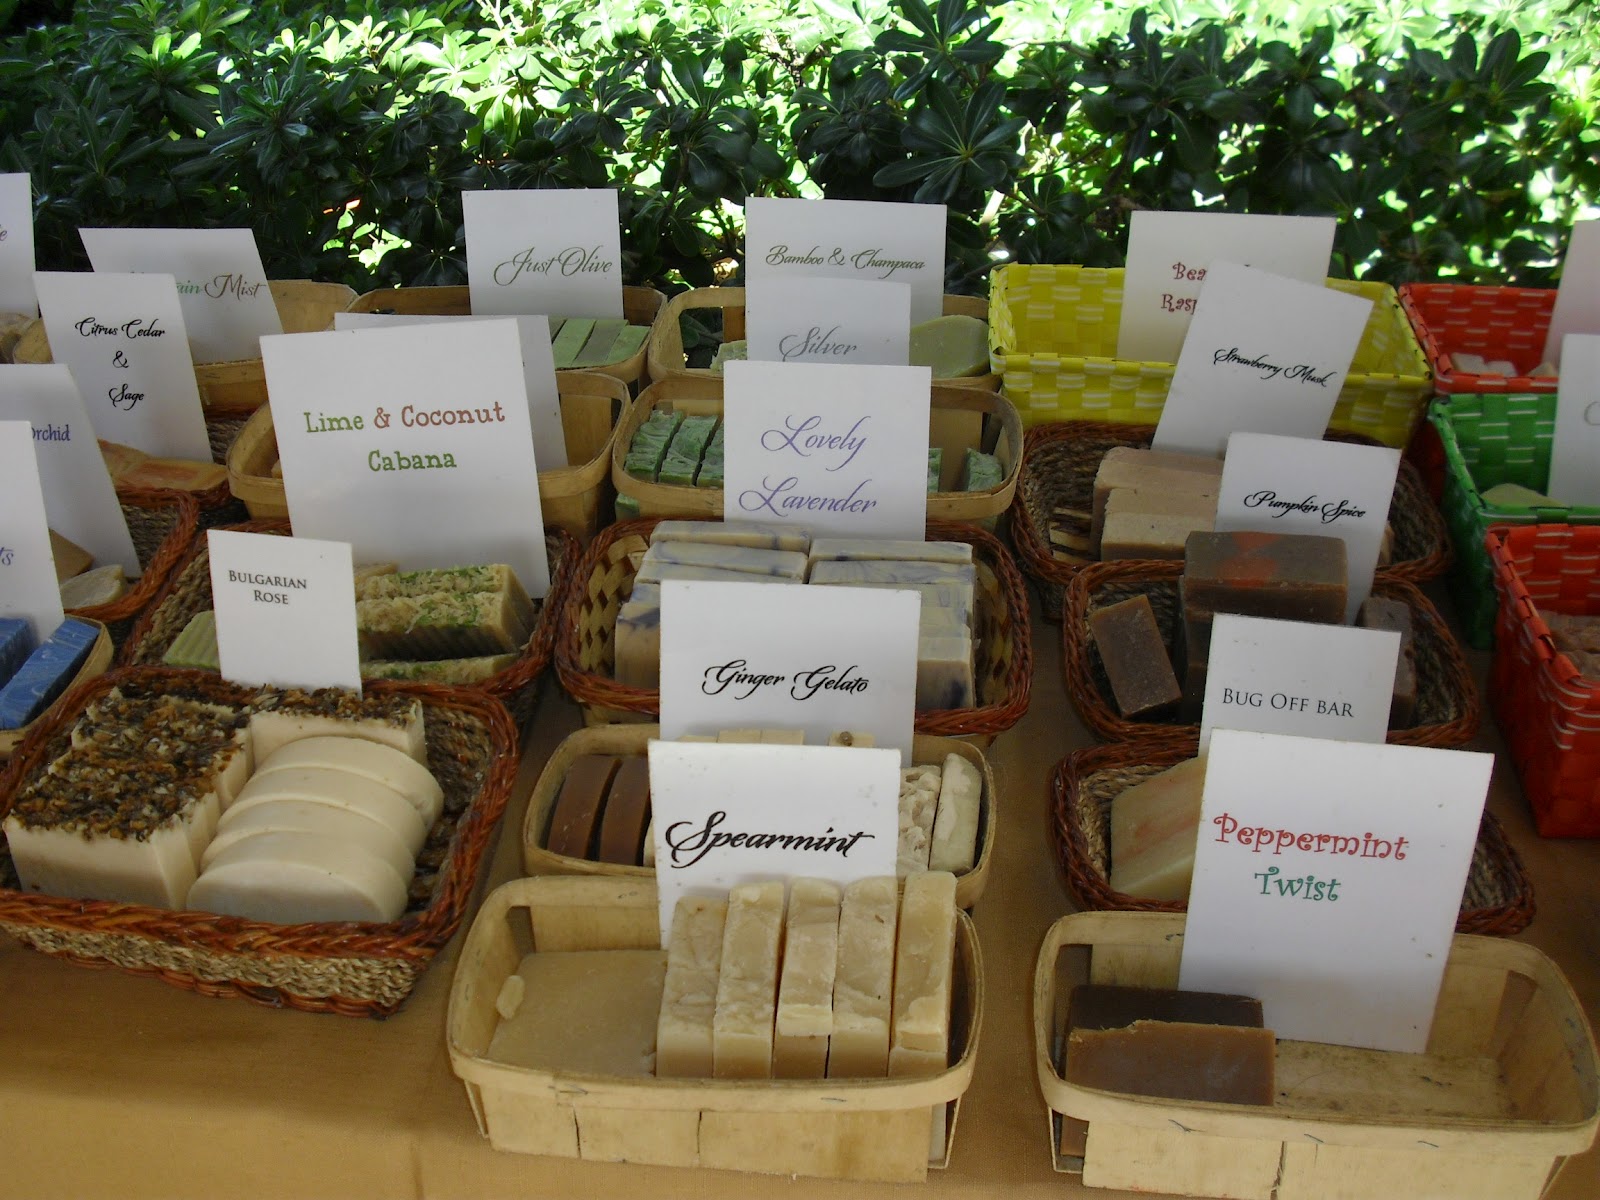
Handmade bars of soap in dozens of flavors.  

I think that these would make great gifts.  At the very least, I know that I would love to receive something like this with which I could pamper myself!  Christmas presents perhaps?!


Sweet potatoes. Eggplant. Zucchini.

Just look at the colors!


Eggplant, zucchini, and crooked-neck squash by the bucket full!


What's red, yellow, and green AND tastes juicy and delicious?!

No. Obviously it's not a stoplight...

...it's a tomato!


These gorgeous portabello mushrooms had me envisioning a mushroom spaghettini right away...
...recipe to (hopefully) come soon!


Citrus of all kinds: lemons, grapefruits, and oranges.


In addition to all the food and art vendors that were selling their goods, there were also a number of food stands that were offering baked goods for breakfast (scones, muffins, turnovers, and doughnuts), hot coffee, freshly squeezed lemonade, raw juices, and one fusion cuisine station that REALLY caught our attention!

Let's just say that the next time we come to the Riverside Arts Market we are coming closer to lunch time AND with empty stomachs!


To top it all off, there was LIVE music to boot!

Next time I envision that, after we have bought our goods for the day, we will grab a bite to eat from the alligator, cop a squat in front of the band, and enjoy a peaceful and relaxing lunch to the sounds of live music and community.  Honestly, what better way is there to spend a Saturday?!


Once we got home, I couldn't wait to spread out all of our purchases on the breakfast table.  I couldn't believe how much we ended up walking away with!

All together now.


I could hardly believe it, but our total haul only cost us $35.00!  

Just in case you can't tell from the pictures above and below, here is a list of all the produce we brought home with us:
  • 1 bunch kale;
  • 1 bunch arugula;
  • 1 basket of green beans;
  • 1 basket of portabello mushrooms;
  • 2 beets;
  • 2 avocados;
  • 2 cucumbers;
  • 4 tomatoes;
  • 4 pears;
  • 5 peaches;
  • 2 banana peppers; and
  • 2 baskets of strawberries. 


It didn't take me long to come up with a delicious use for our farmer's market goods! 

For dinner, to go along with Honey-Roasted Carrots and Bo's Dijon-Basted Chicken Breast, I whipped up an amazing salad that had both of our taste buds dancing!

Farmer's Market Arugula, Strawberry, and Avocado Salad (ASAS)
Serves 2

1/2 medium bunch of arugula, roughly chopped
7 strawberries, sliced
1 avocado, diced
1/8 C sliced almonds
2 T apple cider vinegar
1 T lemon juice
1 T EVOO
1 T Dijon mustard
1 tsp dried crushed mint
1 tsp honey

Directions:

  • Add the arugula, strawberries, avocado and almonds to a medium salad bowl.
  • In a small Mason jar, combine the apple cider vinegar, lemon juice, EVOO, Dijon mustard, mint, and honey.
  • Shake well.
  • Pour 1/2 to 3/4 of the dressing over the salad.
  • Toss to coat.
  • Chill until ready to serve.


Like eating summer on a plate, this salad is light, sweet, and peppery!  I am telling you, the next time you pick up fresh strawberries MAKE. THIS. SALAD.!  It really is delicious.  And if you aren't a fan of cooked carrots (although you should be...if you know how to cook them correctly!), you could make this salad a meal in and of itself my simply topping it with baked chicken or broiled tofu.  Done and done.

Question of the Day:


Is there a farmer's market where you live?  If so, do you visit it regularly?  What is your favorite thing to pick up while you are there?!

Blessings,
Ally and Bo