Showing posts with label beans. Show all posts

October 9, 2012

Sweet Potato (Sort Of) Shepherd's Pie

It seems like forever since I have posted a recipe on the blog, and in some ways, it has been! 
Sidenote: Don't worry, I've still been cooking up a storm, and we've still been eating up a storm.  It's just that I've been cooking a lot of un-recipes...you know, roasted veggies, grains, and protein...nothing fancy.  Just a lot of easy meals that don't really warrant their own posts on the blog.

But today is the day that the recipe-drought comes to an end, and it's coming to an end with a BANG!  This recipe is the perfect way to welcome fall into your kitchen.  It's warm, high on comfort-food flavors, balanced in nutrition, and low in fat...seriously, what more could you ask for?!


Sweet Potato (Sort Of) Shepherd's Pie
Serves 4

For the Topping:
2 small sweet potatoes, peeled and diced
1/4C unsweetened almond milk
1T Smart Balance
1/4tsp cinnamon
1/4tsp nutmeg
1/8tsp salt

For the Filling:
1 1/2tsp vegetable oil
1 yellow onion, diced
2 carrots, peeled and diced
2 green bell peppers, diced
1tsp ground thyme
2tsp dried rosemary
1 1/4C vegetable broth
1 can cannellini beans, drained, rinsed, and patted dry
salt and pepper, to taste

For Garnish:
3oz. shredded cheddar cheese

Directions:
  • Preheat the oven to 375 degrees.
  • Boil water in a medium pot.  Once boiling, add the diced sweet potatoes.
  • Boil for 10 minutes, or until tender.
  • Meanwhile, heat the vegetable oil in a large skillet.  Once heated, add the onion, carrots, and bell pepper, and cook for five minutes.
  • After five minutes, add the thyme, rosemary, vegetable broth, beans, salt, and pepper to the skillet.
  • Simmer for ten minutes.
  • Once the sweet potatoes are cooked, drain and place in a food processor.  Add the milk, Smart Balance, cinnamon, nutmeg, and salt.
  • Process until smooth.  Set aside.
  • Once the filling mixture has simmered for ten minutes, pour it into the bottom of a medium sized casserole dish.
  • Spoon the sweet potato mixture on top, and spread it out until smooth.
  • Bake for 20 minutes.
  • Remove and add the shredded cheese on top.
  • Bake for an additional 10 minutes.
  • Cool for 5-10 minutes before eating.
  • We ate our alongside a spinach salad, and it was the perfect vegetarian meal!


Bo took these pictures because I had to head over to yoga while the pie was in the oven.  They aren't the best pictures on the blog by any stretch of the imagination, but they'll have to do.  Honestly, I am just thankful that he remembered to take pictures AT ALL before devouring the shepherd's pie entirely!

(He did save me one piece...and yes, that means he ate 75% of the casserole all on his own!)


If you recreate this at home, don't be scared to play around with the filling ingredients.
For example, you could use leeks, turnips, broccoli, cauliflower, zucchini, squash, etc.
You name it - and you could probably use it in the filling.  
So, get creative.
Use WHATEVER you have on hand!
It will still be equally delicious.

Question of the Day:

Do you like shepherd's pie?  If not, how about pot pie?!

Blessings,
Ally and Bo

July 13, 2012

The Secret to Restaurant-Quality Homemade Hummus that NO ONE Tells You

Picture this:

Bo and I are sitting in a Mediterranean restaurant - starving - when the waitress walks over and delivers our appetizer: hummus with pita bread.  We both grab a triangle of pita, dip deeply into the traditional bean dip, and then utter a sigh of intense satisfaction at the perfect creaminess and rich flavor.  Now this is hummus!

And then, inevitably, I get pissed off.

Because I seriously love hummus, and it sincerely irritates me that, for some completely unknown reason, I cannot seem to recreate this seemingly simple dip at home.  I mean, honestly, how hard should it be to blend a few ingredients together in my food processor?!  I use the same ingredients that every recipe tells me to.  I use the same proportions that every restaurant chef has instructed me to; and yet it is never. the. same.!

(Insert exasperation here!)

Well today, I offer hope to all of the exasperated-homemade-hummus-makers of the world; and that hope comes in the humble form of a single phrase: 

COOK THE BEANS!


I have no idea why no recipe mentions this small little fact (actually, I think that it is a conspiracy, contrived by the Mediterranean restaurants of the world, against all at-home cooks that wish to recreate this traditional dish in the comfort of their own kitchen), but it will seriously turn your hummus-making-world upside down!  By simply cooking the beans the texture is smoother and the flavor is more robust (and, yet, simultaneously more delicate).  


Seriously, this one. little. change. will instantly turn your so-so hummus into restaurant quality!


Traditional Hummus
Serves 8-10

1 can garbanzo beans: drained, rinsed, and cooked (see below for more detail)
scant 1 tsp salt
1 tsp paprika
6T lemonjuice
1/3C tahini
2-4T leftover cooking liquid (or water)
EVOO, for garnish

Directions:
  • Place the drained and rinsed garbanzo beans into a medium saucepan.
  • Barely cover with water, bring to a low boil, and then reduce to simmer for 45-55 minutes.
    • Note: You should be fine, but make sure that all of the water doesn't evaporate out of the pan, leaving the beans to burn.  There should always be a shallow level of water in the pan.
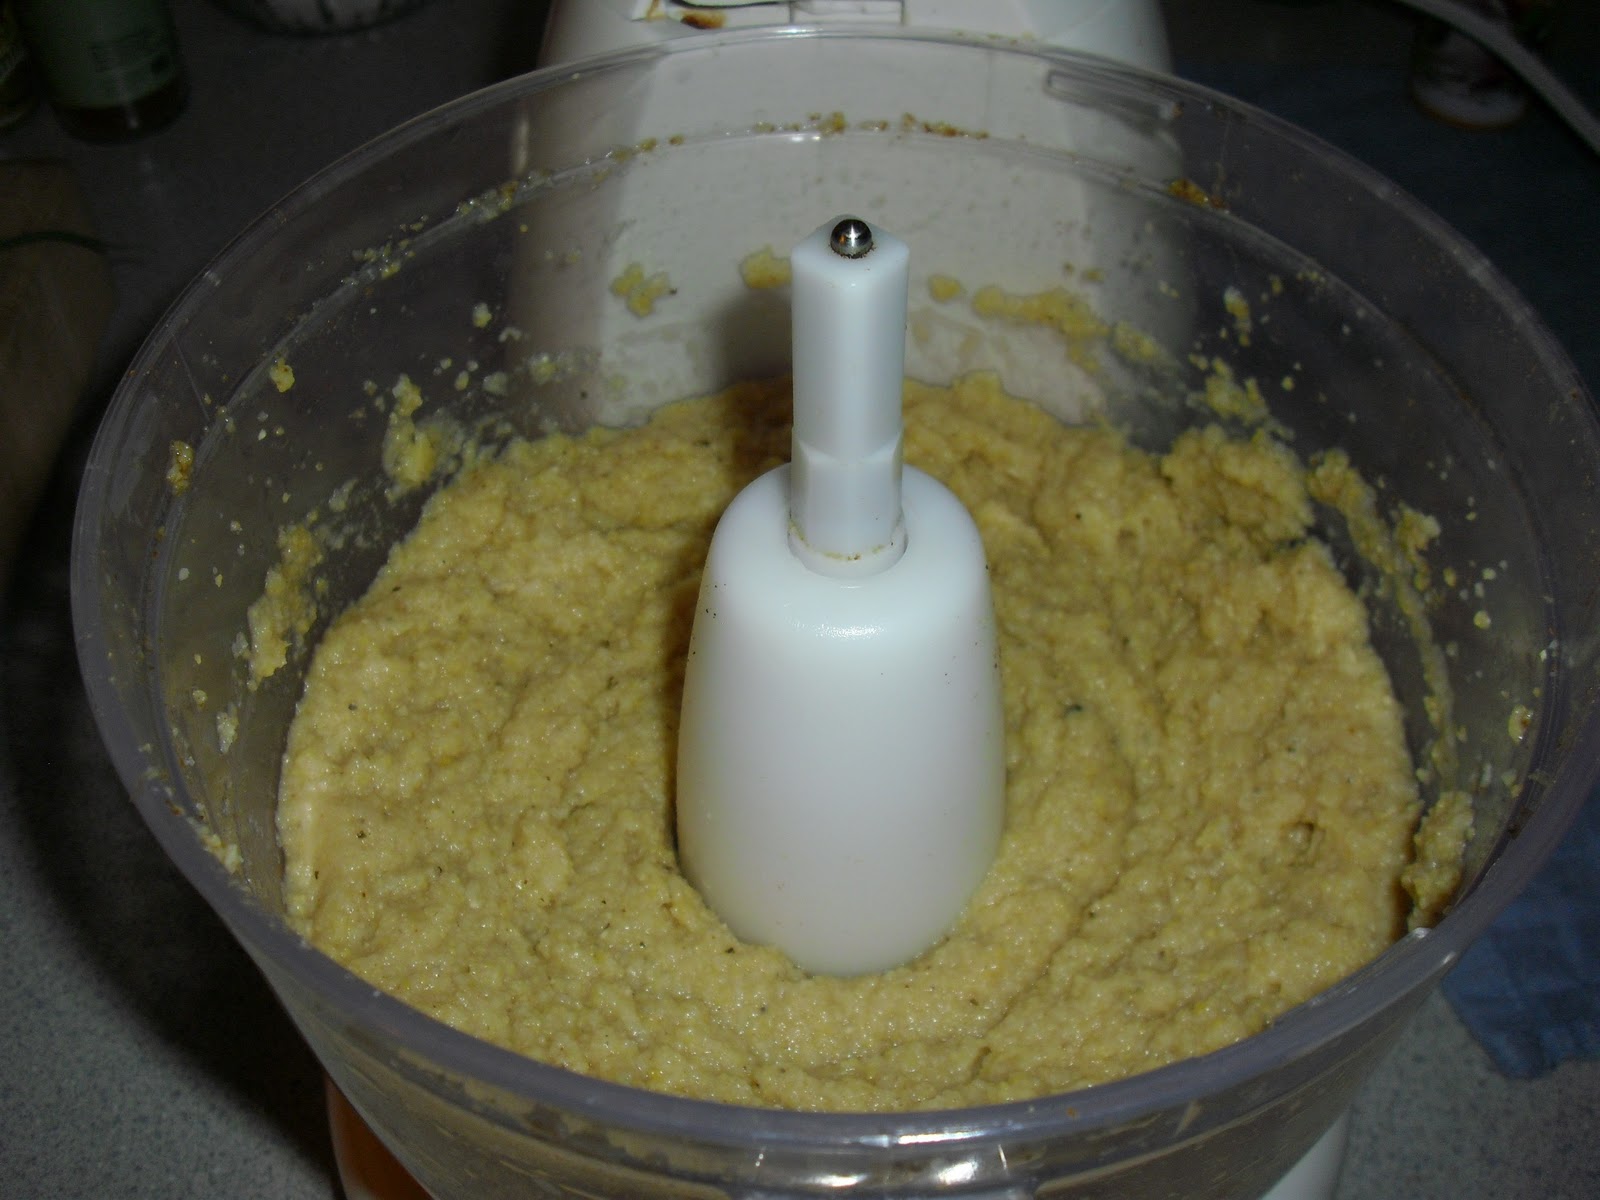
  • Once the beans have cooked and softened, immediately place them into the food processor with the salt, paprika, lemonjuice, and tahini.
  • Process the mixture on low.
  • As the mixture is processing, add in 2-4T of the leftover cooking liquid (or water).
  • Increase the processing speed to medium - or high - for one minute.
  • Transfer the hummus to a medium Tupperware container.
  • Serve chilled and garnished with EVOO alongside crudites, crackers, etc.


As a bit of a side-note, I prefer to garnish the hummus with EVOO right before I serve my hummus.  I have found that, if I add the EVOO beforehand, it hardens in the refrigerator and doesn't taste as good (not to mention the texture, which is similar to solidified bacon grease...not exactly appetizing).  You certainly don't have to do this, but I thought I would pass along the suggestion just in case!


As a side-note: the next time you make my "Cheesy" Hummus, Salsa Hummus, Roasted Red Pepper and Cilantro Hummus, or Avocado Hummus make sure to COOK THE BEANS!

Tomorrow we're off to a pool party!  Hopefully I will remember my camera and have a fun weekend post to share with you next time.

Question of the Day:


Do you have any "secret tricks" in the kitchen?!  If so, I would love for you to share one (or two) in the "Comments" below!

Blessings,
Ally and Bo

April 16, 2012

Creamy Cool Mexican Salad

Bo and I eat Mexican food a lot.  Blame it on our mutual love of New Mexico, but we can't get enough of the stuff!  We have some variation of Mexican food at least once a week...and sometimes we go on "kicks" and eat Southwestern food almost every day.  It varies, but in general, we LOVE spicy, creamy, beany (is that even a word?), peppery Mexican food!

With that said, I always have a plethora of pantry/refrigerator items that could turn into a Southwestern feast at any time.  Imagine this:

  • it's 6:00PM on Saturday evening;
  • your husband has just reminded you that you will be feeding an extra, hungry, male mouth this evening;
  • you have been attending a physically demanding yoga workshop for the past two days, and are therefore exhausted; and
  • you are already starving.

What would you do?  
Well...I can't exactly answer that.  

HOWEVER, I can tell you that that is exactly the scenario that I found myself in this past Saturday, and here is what I did:


Cool, crisp, crunchy, and delicious, this Mexican salad is both hearty and light - making it perfect for the warmer months.  Open a few cans, chop a few vegetables, and dash in a few spices and WHA-LAA(!), a salad is born!  If you love Southwestern food and/or salad, this recipe is for you!


Creamy Cool Mexican Salad
Serves 4-8 (4 as an entree, 8 as a sidedish)


3 Roma tomatoes, diced
1 green bell pepper, diced
2 jalapenos, minced
2 avocados, diced
1 can black beans, drained and rinsed
1 can corn, drained and rinsed
2 T lime juice
2 heaping T veganaise (or mayonnaise)
1/2 tsp cumin
1/2 tsp chili powder
1/4 - 1/2 tsp cayenne (we used 1/2 because we like it HOT!)
1/2 tsp salt
1/4 tsp pepper

Directions:

  • Add the diced/minced tomatoes, bell pepper, and jalapenos to a large salad bowl.
  • Pour in the drained and rinsed beans and corn.
  • In a small mixing bowl or a medium jar, mix/shake together the lime juice, veganaise, cumin, chili powder, cayenne, salt, and pepper.
  • Pour the dressing over the salad mixture.
  • Add the diced avocados on top.
  • Toss to fully incorporate all ingredients.
  • Refrigerate for 30 minutes, or up to an hour (any more than an hour and the avocado will start to turn).
  • Serve atop salad greens with rice, tortillas, or chips alongside!

With the help of a good friend, we devoured all but about 1/2 cup of this salad in a single sitting!  The dressing was the perfect complement to the fresh and crunchy vegetables.  Even before I was vegan, I wasn't much of a mayonnaise fan.  However, this salad really needs the creaminess that it lends.  Don't skip the mayo!  As for the jalapenos, we like it HOT!  If you don't want so much heat, just cut it down to one jalapeno (as opposed to two), and reduce the cayenne to 1/4 tsp.  That should do it!


Next up on the ABC blog- all about my yogatastic weekend!  I learned so much, and I can't wait to share it with you here on the blog, and with my students in the studio.  I am a little sore (ok, I'll be honest, I'm a LOT sore), but every sore muscle is worth it.  I had an A.M.A.Z.I.N.G. time, and I feel more excited than ever about my yoga practice and my ability to share it with others!

Question of the Day:

Mild vs. Medium vs. Hot: how do you like your Mexican food?!

Blessings,
Ally and Bo

March 16, 2012

Creamy Energy Power Salad

In addition to writing here on the ABC blog, I also regularly read about half a dozen other food/fashion blogs. I am pretty selective in my reading, so these elite five-six blogs must be pretty good to have made the cut!  If you haven't noticed "My Blogroll" before on the toolbar to the right, you might like to check it out sometime.  These ladies come up with amazing vegetarian/vegan cuisine, and frequently do it in style as well!

With that being said, it isn't uncommon for these blogs to serve as my inspiration for recipes, outfits, and home decor on a regular basis.  In fact, the dressing for today's Creamy Energy Power Salad is borrowed from Angela Liddon of Oh She Glows.  Angela is one creative cat in the kitchen!  She comes up with so many delicious and healthy recipes that have me drooling every time.  When I saw this Creamy Avocado Lime Dressing, I knew right away that I had to come up with an original way to use it!

For me, avocados frequently = Mexican cuisine.  Blame it on living in New Mexico for so many years, but you say "avocado" and I think salsa and chips, enchiladas, green chile, refried beans, chile rellenos, and quesadillas!  Since we didn't have any tortillas at the time, I decided to use what we had on-hand to create this protein-packed and energy-filled salad.  Trust me, it didn't disappoint!

Full of healthy fats and protein-rich beans, this salad will keep you energized and mentally sharp for hours!  With the perfect balance of whole grains, vegetables, fruits, protein, and fat, this salad is a champion of health and nutrition.


Creamy Energy Power Salad
Serves 2-4

1/2 can black beans, rinsed
1/2 can hominy, rinsed
2 tomatoes, diced
1/2 tsp chili powder
1/4 tsp cayenne pepper
1/4 tsp salt
1/8 tsp pepper
1 red bell pepper, sliced and roasted
1 tsp EVOO
1/2 C rice, cooked and chilled
2-3 handfuls of Spring Salad Mix
1/4 C Creamy Avocado Lime Dressing from Oh She Glows

Directions:

  • Cook the rice on the stove-top (i.e. 1/2 C rice + 1 C H2O + 20 minutes on the stove-top = perfectly fluffy rice!)
  • Place the black beans, hominy, tomatoes, chili powder, cayenne, salt, and pepper into a medium mixing bowl.  Toss to coat.

  • While the bean/hominy mixture is marinating, slice your bell pepper, toss it in olive oil, and roast at 450 degrees for 5-10 minutes.
    • Note:  You will want the bell pepper to blacken around the edges, but you do not want it to burn.  Watch it closely for the last couple of minutes in the oven!  They should end up looking something like the picture below.

  • Add the rice, bean/hominy mixture, and bell pepper into a large salad bowl with the Spring Salad Mix.  
  • Toss gently.
  • Begin by pouring 1/8 C dressing onto the salad and incorporate fully.  
  • Add more, up to 1/4 C, until you have reached your desired coating.
  • Due to the avocado, this salad is best served immediately.  
    • Note:  Leftovers of this salad will not be very good.  Therefore, I would suggest either halving the recipe or eating it all in a single day.

Next time - I will share the beginnings of a new fashion/style project.  Maybe some of you will even be inspired to join me!!!

Question of the Day:

If you need lots of energy for the day, what is your go-to meal?!

Blessings,
Ally and Bo

February 15, 2012

3-Layer Mexican Casserole

Last night continued my efforts to use up what was in our refrigerator, freezer, and pantry before we leave on our trip.  I almost always have beans and rice on hand, but I wanted to whip up a little more exciting than the boring old staple.  After a brief scavenging around the kitchen, I discovered:

  • salsa;
  • green chile;
  • frozen corn;
  • a red bell pepper; and
  • Daiya cheese.

Visions of the party-favorite 7-layer dip immediately came to mind.  By my count, I had no where near enough ingredients for seven layers...but an idea had been born, so I rolled with it!  


This is a Mexican-style casserole with a little kick!  If you like heat, go ahead and use "hot" salsa and "hot" green chile.  The final result is creamy, hearty, and as Bo says, "fills you up right!"

3-Layer Mexican Casserole
Serves 4-6

For the Rice Layer:
1 C brown rice
1 3/4 C water
1/2 C salsa (preferably HOT!)

For the Vegetable Layer:
1 C corn
1 red bell pepper, diced
1/2 tsp cumin
1/2 tsp salt
1/4 tsp pepper

For the Bean Layer:
1 can refried beans
1 4 oz. can of hot green chile
1/2-3/4 C Daiya cheese (or other cheese)


Directions:

  1. Place the rice and water in a medium saucepan.
  2. Boil, reduce to simmer, and allow to cook for 20 minutes.
  3. Meanwhile, mix the refried beans and green chile in a small saucepan over low heat.
  4. In a separate pan, saute the corn, bell pepper, salt, pepper, and cumin over medium heat.  Continue cooking until the corn and bell pepper begin to soften and brown slightly.
  5. Once the rice is cooked, mix in the salsa.
  6. Now you are ready to layer your casserole in a medium/large oiled dish:
    1. Place all of the salsa rice in the bottom of the dish.
    2. Cover with the vegetable mixture.
    3. Spread the bean mixture on top.
    4. Sprinkle with cheese.
  7. Bake at 350 degrees for 7-12 minutes until the cheese is melted.

Recently, I've been trying to learn more about my camera.  I have been taking it off of "automatic" mode in an effort to take more professional pictures for the blog.  However, a lot of the recipes I end up putting on the blog are cooked in the evening.  Therefore, by the time I need to take pictures, the sun has gone down and I am left without any natural light (which, I have read, is best for quality photography).  Last night I took several with the flash, and several without...but I can't decide which one looks better.  What do you think? (just leave a comment in the "Comments" section below).

With the flash...

Without the flash...

Bo ate his casserole with roasted chicken.  Believe it or not, every bit of this plate was devoured, and later on in the evening he went back for seconds of the casserole.  Today, he asked me if there was any left for lunch...if you ask me, I think he kinda likes this one! :)

FYI - This picture is without the flash.

Next time - I promise you that oatmeal recipe that will keep you full for hours!  And this time, I mean it!

Question of the Day:

What's your favorite throw-together meal?  Or, like most people, do you just get take-out on nights when the refrigerator/pantry are low?!

Blessings,
Ally and Bo

January 3, 2012

Senora's Potatoes + Salsa Hummus

On Sunday evening I was in the mood for "breakfast for dinner."  However, this was no ordinary breakfast craving because I wasn't in the mood for pancakes, I wasn't in the mood for French toast, and I wasn't even in the mood for oatmeal or a breakfast casserole (which are both solid standbys in my recipe repertoire).

So, I asked, what was I in the mood for?!

Hashbrowns!

But not just any hashbrowns...I was in the mood for Senora's potatoes.

Who is Senora?  Well, her full name is Senora Lourdes (Lulu) Rodriguez, and she was my family's host when we visited Guanajuato, Mexico numerous times from 2000-2002.  Each time that I, my Pee Paw, my Mee Maw, or my mother (or a combination thereof) made our way down to Guanajuato, we would stay in Senora's home for the duration of our visit.  She served as our "host family" by providing us food, lodging, and a willing individual with whom we could practice our Spanish. 


But Senora was so much more than that!  Our family and hers became close.  For several years our visits were quite regular (every 4-6 months or so).  In fact, during our last visit, Senora gave our family a beautiful piece of art (a sculpture of a native warrior) that would serve as a reminder of our time spent in the beautiful city of Guanajuato. 

On top of all that, Senora was a magnificent cook!  Every meal that we had seemed to top the one before it.  It's amazing that we all didn't gain 10-15 pounds while we were living in her home (then again, I'm sure that had to do with the fact that we walked up and down hill-y streets all. day. long.).

The houses are built into the mountain.

The pathways to homes are very steep and narrow.

My time in Guanajuato has had a profound impact on making me the woman I am today:

  • I, in large part, majored in Spanish during my undergraduate degree program because I fell in love with the Spanish language during my time in Mexico;
  • I chose to write my graduate degree thesis on Hispanic migrant children in the American public school system because they reminded me of the children's faces in Guanajuato; and
  • I worked as a translator throughout my graduate degree program in an effort to serve immigrants in this country while maintaining an advanced level of written and spoken Spanish.

Even now, I jump at any opportunity to use my knowledge of the Spanish language!  What can I say?!  I am a dork who loves to speak Spanish!  :)

Okay, okay...so enough about my past.  You want a recipe, right?!  The following recipe is based off of my memory of how Senora Lulu made breakfast potatoes (i.e. hashbrowns)

Note: My mom also cooks this recipe, and she does it a little different than I do (i.e. no tomatoes, cumin, chili powder, or cilantro).  I, however, find that these additions take the recipe to the next level!


Senora's Potatoes
Serves 2

1 medium, Russet potato
1/2 red onion
2 large jalapenos (We like it HOT in the Behne house!)
1 yellow bell pepper
2 tomatoes
1 T oil
1/2 tsp cumin
1/4 tsp chili powder
1/2 tsp salt
1/4 tsp pepper
shredded cheese, for garnish
cilantro, for garnish

Directions:

  • Place the potato, onion, and jalapeno into the food processor.  Pulse 5-7 times until shredded.


  • Place the potato mixture into a heated (medium high), well-oiled skillet; pat into a flat circle.


  • Meanwhile, dice the bell pepper and tomato.
  • After approximately 4-5 minutes, check if the potato mixture is beginning to brown.  If so, using a spatula, flip section of the hashbrowns so that they can brown on the other side.


  • Add bell peppers and tomatoes to the potato mixture.  Cook 2-3 minutes.


  • Add seasonings and toss to incorporate.
  • Sprinkle cheese on top, cover, and allow to melt.


  • Serve with a garnish of cilantro, fried eggs (optional), and a side of salsa hummus (see recipe below).

Now, about that salsa hummus...when I started to make my "Roasted Garlic and Cayenne Hummus" Bo protested because he wanted something different.  So, I asked him what he wanted, and he suggested adding salsa to the mix.  Little did I know that this would turn out to be de-lic-ious!  Without a doubt, this recipe will be added to my regular hummus rotation.


Salsa Hummus
Serves 8-10

1 can great northern beans, drained
2 T tahini
2 T EVOO
4 T medium or hot salsa (we used medium)
3/4 tsp salt
1/2 tsp cumin
1/8 tsp cayenne

Directions:

  • Add all ingredients to your food processor. 
  • Whirl for 2 minutes, or until all ingredients are incorporated and the mixture is smooth and creamy.

Up Next - a "blue" book review!  Any guesses to which book I am referring to?!

Question of the Day:

Do you cook any recipes that remind you of a person or a place?!

Blessings,
Ally and Bo

November 14, 2011

Mexican Polenta Casserole with Avocado Cream Sauce

Last night I was craving Mexican food.

As I rummaged through my pantry and refrigerator, I realized that I didn't have tortillas, but I did have polenta, I didn't have black beans, but I did have refried beans, I didn't have salsa, but I did have tomato sauce, and I didn't have sour cream, but I did have avocados and cheese. 

I am going to let you in on a little secret.  I have a process that I follow when I am creating a new recipe.  For instance:

  1. A craving or idea comes to the forefront of my mind;
  2. I survey my pantry and refrigerator to see what I have on hand;
  3. I get a rough idea of what I might like to make;
  4. I research online and in my cookbooks for similar recipes; and
  5. Drawing inspiration from my research, I sit down with a pen, pad of paper, and my own ingredient list and create a totally new and unique recipe.
So last night, after following these steps, I came up with this casserole.  It is rich, filling, and has just the right amount of kick to it!

Mexican Polenta Casserole
Serves 4

1 tube polenta
1/2-1 C water
1 tsp cumin powder, divided in half
1 tsp chili powder, divided in half
1/4 tsp salt
1 T EVOO
1/2 C corn
1/2 C carrot, diced
1/2 red bell pepper, diced
1/2 yellow onion, diced
1/2 can refried beans
1 4 oz. can of hot green chile
4-8 oz. tomato sauce
4 oz. shredded cheese

Directions:

  • Preheat oven to 375 degrees.
  • Slice polenta tube into 1 inch rounds.
  • Process polenta, water, 1/2 tsp cumin powder, and 1/2 tsp chili powder until smooth.

  • Heat oil in a non-stick pan.
  • Saute onion, bell pepper, carrots, corn, and salt until tender (approximately 5-8 minutes).


  • Meanwhile, heat refried beans until warm and smooth.
  • Add green chile to the refried beans, and stir until smooth.


  • Add tomato sauce, 1/2 tsp cumin powder, and 1/2 tsp chili powder to tender vegetables.
  • Layer casserole:
    1. 1/2 polenta mixture
    2. bean mixture
    3. vegetable mixture
    4. 1/2 polenta mixture
    5. cheese
  • Bake at 375 degrees for 30 minutes.

Note: Next time, I would begin by cooking the bottom layer of polenta for 15 minutes.  The flavors of this recipe were spot on.  However, because the polenta was not cooked when I layered the casserole, it didn't hold its shape as well as I had hoped.  I think this could be easily remedied by pre-baking the bottom layer of polenta for 15 minutes at 375 degrees, and then continue layering the casserole accordingly.

As a side dish, both Bo and I had the casserole with a spinach, pear, and pecan salad.  YUM!

Bo's had blue cheese dressing!

Mine had Superfruit Vinaigrette!

Since we didn't have any sour cream, I decided to make an Avocado Cream Sauce to dollop on top of the casserole.  This sauce was delicious!  If you love guacamole, you will really love this sauce.  It is smooth, creamy, and has just the right about of "tang" to balance the casserole's rich and heavy flavors.


Avocado Cream Sauce
Serves 4

2 ripe avocados, flesh removed
2 scallions, diced
2 T lime juice
1/4 tsp salt
1/4 tsp cumin powder
1/8 tsp cayenne pepper
1/2-1 T vegetable broth, if needed

Directions:

  1. Place all ingredients, except for the broth, into a food processor.
  2. Process until smooth.
  3. Add 1/2-1 T broth if needed for a smoother consistency (I added 1/2 T).
All in all, I think this recipe creation was a success!  As I mentioned in the note above, the only thing I would change is baking the bottom layer of polenta for a few minutes prior to piling on the rest of the layers.  Other than that, this casserole totally hit the spot and satisfied my craving for comforting Mexican flavors.

Question of the Day:

Do you ever create your own recipes?  If so, do you have a process you follow, or do you just "fly by the seat of your pants"?

Blessings,
Ally and Bo

November 2, 2011

Mexican-Inspired Pasta Toss

Change of plans: no yoga post today.


I was all ready and excited for today's yoga post, when I encountered a snag in my plan. 

You see, my photographer (i.e. Bo) has been working late hours at his other job (i.e. flying for the United States Navy. I know, how dare he, right?!  Hahaha...totally kidding!).  Thus far, I haven't been able to wait up until 10:30-11:00 p.m. for a yoga photo shoot!  Moreover, I have yet to figure out how to set the timer on my camera, much less position it perfectly to capture the yoga poses on my own.  With that said, my next yoga post will just have to wait until my camera man is back in the home office! :)

Instead, today you get a scrumptious pasta dish!


Before Bo left this morning, he asked if I might make him a midnight snack for when he gets home.  As I have mentioned in previous posts, Bo gets quite ravenous in the evening!  It is getting close to our weekly grocery store run, so our refrigerator is a little sparse...especially in the meat category.  So, I needed to get creative and come up with something that was both flavorful and protein-packed. 

I must say, the end-result far exceeded this not-so-pasta-loving-girl's expectations!  (Yeah, I know, I'm weird...I just don't really love pasta all that much.)

Mexican-Inspired Pasta Toss
Serves 3-4

  • 2 medium zucchini, sliced into half moons
  • 1 crooked neck squash, sliced into half moons
  • non-stick cooking spray
  • 1/2 tsp Herbamare, spicy blend
  • 1/4 tsp black pepper
  • 1/4 tsp cumin
  • 2 servings penne pasta
  • 1-2 T cilantro, minced
  • EVOO
  • 1 can pinto beans, rinsed
  • cheese for garnish (I used Daiya mozzarella)

 Directions:

  • Place half-moon zucchini and squash on a greased baking sheet.
  • Sprinkle Herbamare, pepper, and cumin over vegetables and toss to coat.
  • Bake at 400 degrees for 18-20 minutes, tossing every 8-10 minutes to ensure even roasting.

  • Cook pasta according to package directions.
  • Drain beans.
  • Once pasta is cooked, drain, and immediately toss pasta and beans together in a large serving bowl.
  • Add minced cilantro, EVOO, and a pinch of salt and pepper.
  • Toss to coat.

  • When vegetables begin to brown around their edges, remove from oven and immediately toss into large serving bowl with the pasta mixture.


  • Garnish with cheese and an extra sprinkle of cumin.

I think cumin is the key ingredient to this dish.  Actually, cumin is one of my favorite spices!  I was surprised to discover that cumin is among the top 10 selling spices in the U.S.  It plays a key role in spice combinations such as taco seasoning, chili powder, and Mexican and Southwestern dishes. Cumin is also an essential ingredient in virtually every global cuisine, particularly the more trendy foods of North Africa, India and the Middle East. (citation)

In totally unrelated, but too-cute-not-to-post news, take a look at my friend Bethany's son Everett in his Halloween costume!


Isn't he the cutest thing EVER?!

Bethany is so creative.  She crocheted his hat and bib in a few hours!  And take a look at that adorably painted pumpkin!  I almost squealed when they dropped by Halloween night to visit. :)  Everett was just too cute for words!  I can't wait to see what costumes Bethany will come up with in the years to come...

Question of the Day:

Do you have a favorite spice? 

In addition to cumin, I also love cinnamon!  Bo always jokes with me about how much I use cinnamon.  The other day I was making him a turkey and cheese sandwich and he says, "Just make sure you don't put cinnamon on it!" 

I almost sprinkled it on there just to spite him :) hahaha!

Blessings,
Ally and Bo

October 12, 2011

All About Avocados

Let's get this blog started off on the right foot!  Or is it the left foot?  Nevermind... :)

How about some yummy recipes?  Even better, how about a couple of recipes utilizing the perfectly ripe avocados sitting in your fruit basket?  Yeah yeah - I hear you dad - I know you don't like avocado.  But, for all the rest of you avocado-loving people out there, I have a couple of bright ideas for you!

First, homemade hummus.  If you have never made your own hummus you don't know what you are missing!  First, it is exponentially cheaper than buying prepared hummus in the store (my can of beans was on sale for $.88 and I was able to make 8-10 servings at 2T each).  Second, the sky is the limit when it comes to creative flavors!  So, get your apron on and get processing...

Avocado Hummus - adapted from here

1 can of great northern beans (drained but not rinsed)
2 heaping tsp of minced garlic
1/4 C tahini
1/2 tsp kosher salt
1/4 tsp pepper
1/4 scant C limejuice
1 avocado
2 large handfuls of spinach

Just put all of the ingredients into your food processor and let it run for approximately two minutes.  It will appear to be mixed after about thirty seconds, but the longer you let the processor do its job the creamier your hummus will get.  So let it rip...or should I say whirl?

I use great northern beans instead of chickpeas for my homemade hummus.  Maybe it is my food processor, but I can't seem to achieve the same creaminess with garbanzo beans.  I have also found that canned garbanzos can have quite a strong taste.  Whereas great northerns seem to adapt to whatever the flavor-of-the-day may be.  :)

Just look how pretty and green!

After making my healthy-green hummus I realized I still had one avocado that HAD TO be used today.  One more day and this beautiful baby would have been past its prime!  So, what to do?  Well, into the pantry I went, and lo-and-behold I found another can of beans, black beans to be exact (are you noticing a theme here?).  So, my mind starting working.

Hmmm....avocado - check.  Black beans - check.  1/4 of a red onion in the refrigerator - check.  I smell Mexican flavors!  So here is what I came up with:

Use-It-Up Mexican Salad

1 can black beans (drained and rinsed)
2-3 T lime juice
1/4 C parsley, minced (cilantro would be even better!)
1/4 red onion, chopped finely
1/4 T EVOO
3/4 tsp ground cumin
1/4 tsp kosher salt
1/8 tsp pepper
dash of cayenne
1 avocado, chopped in small cubes

Putting it all together is very simple. 

1.  After you drain and rinse the black beans, add them to a medium bowl. 
2.  Chop and add the parsley, red onion, and avocado.
3.  Add the seasonings.
4.  Stir and chill for 30 minutes or up to three hours.
5.  Serve on its own, as a tortilla filling, or with chips.

These two recipes have ensured that I'm getting all my healthy fats for the next couple of days.  Not only that, they taste fantastic!

Tomorrow - a recipe with sweet potatoes and pumpkin pie spice...are you salivating yet?!

Question of the Day:

What do you do with your perfectly ripe avocados?

Blessings,
Ally and Bo